Artistic Pie Crust Designs
|
Whether you’ve been baking since you knew how to hold a wooden spoon, or have just started experimenting with simple desserts yesterday, it’s never too late to spice up your pie making game! With the guidance of Tracy Shaw of FoodWineSunshine on Instagram, she’s showed us three different ways to create Artistic Crust Designs for your next apple or pear pie. Read on to learn how you can transform a simple Galette, or your favorite apple pie recipe, into a work of delicious art.
Simple, but Elegant
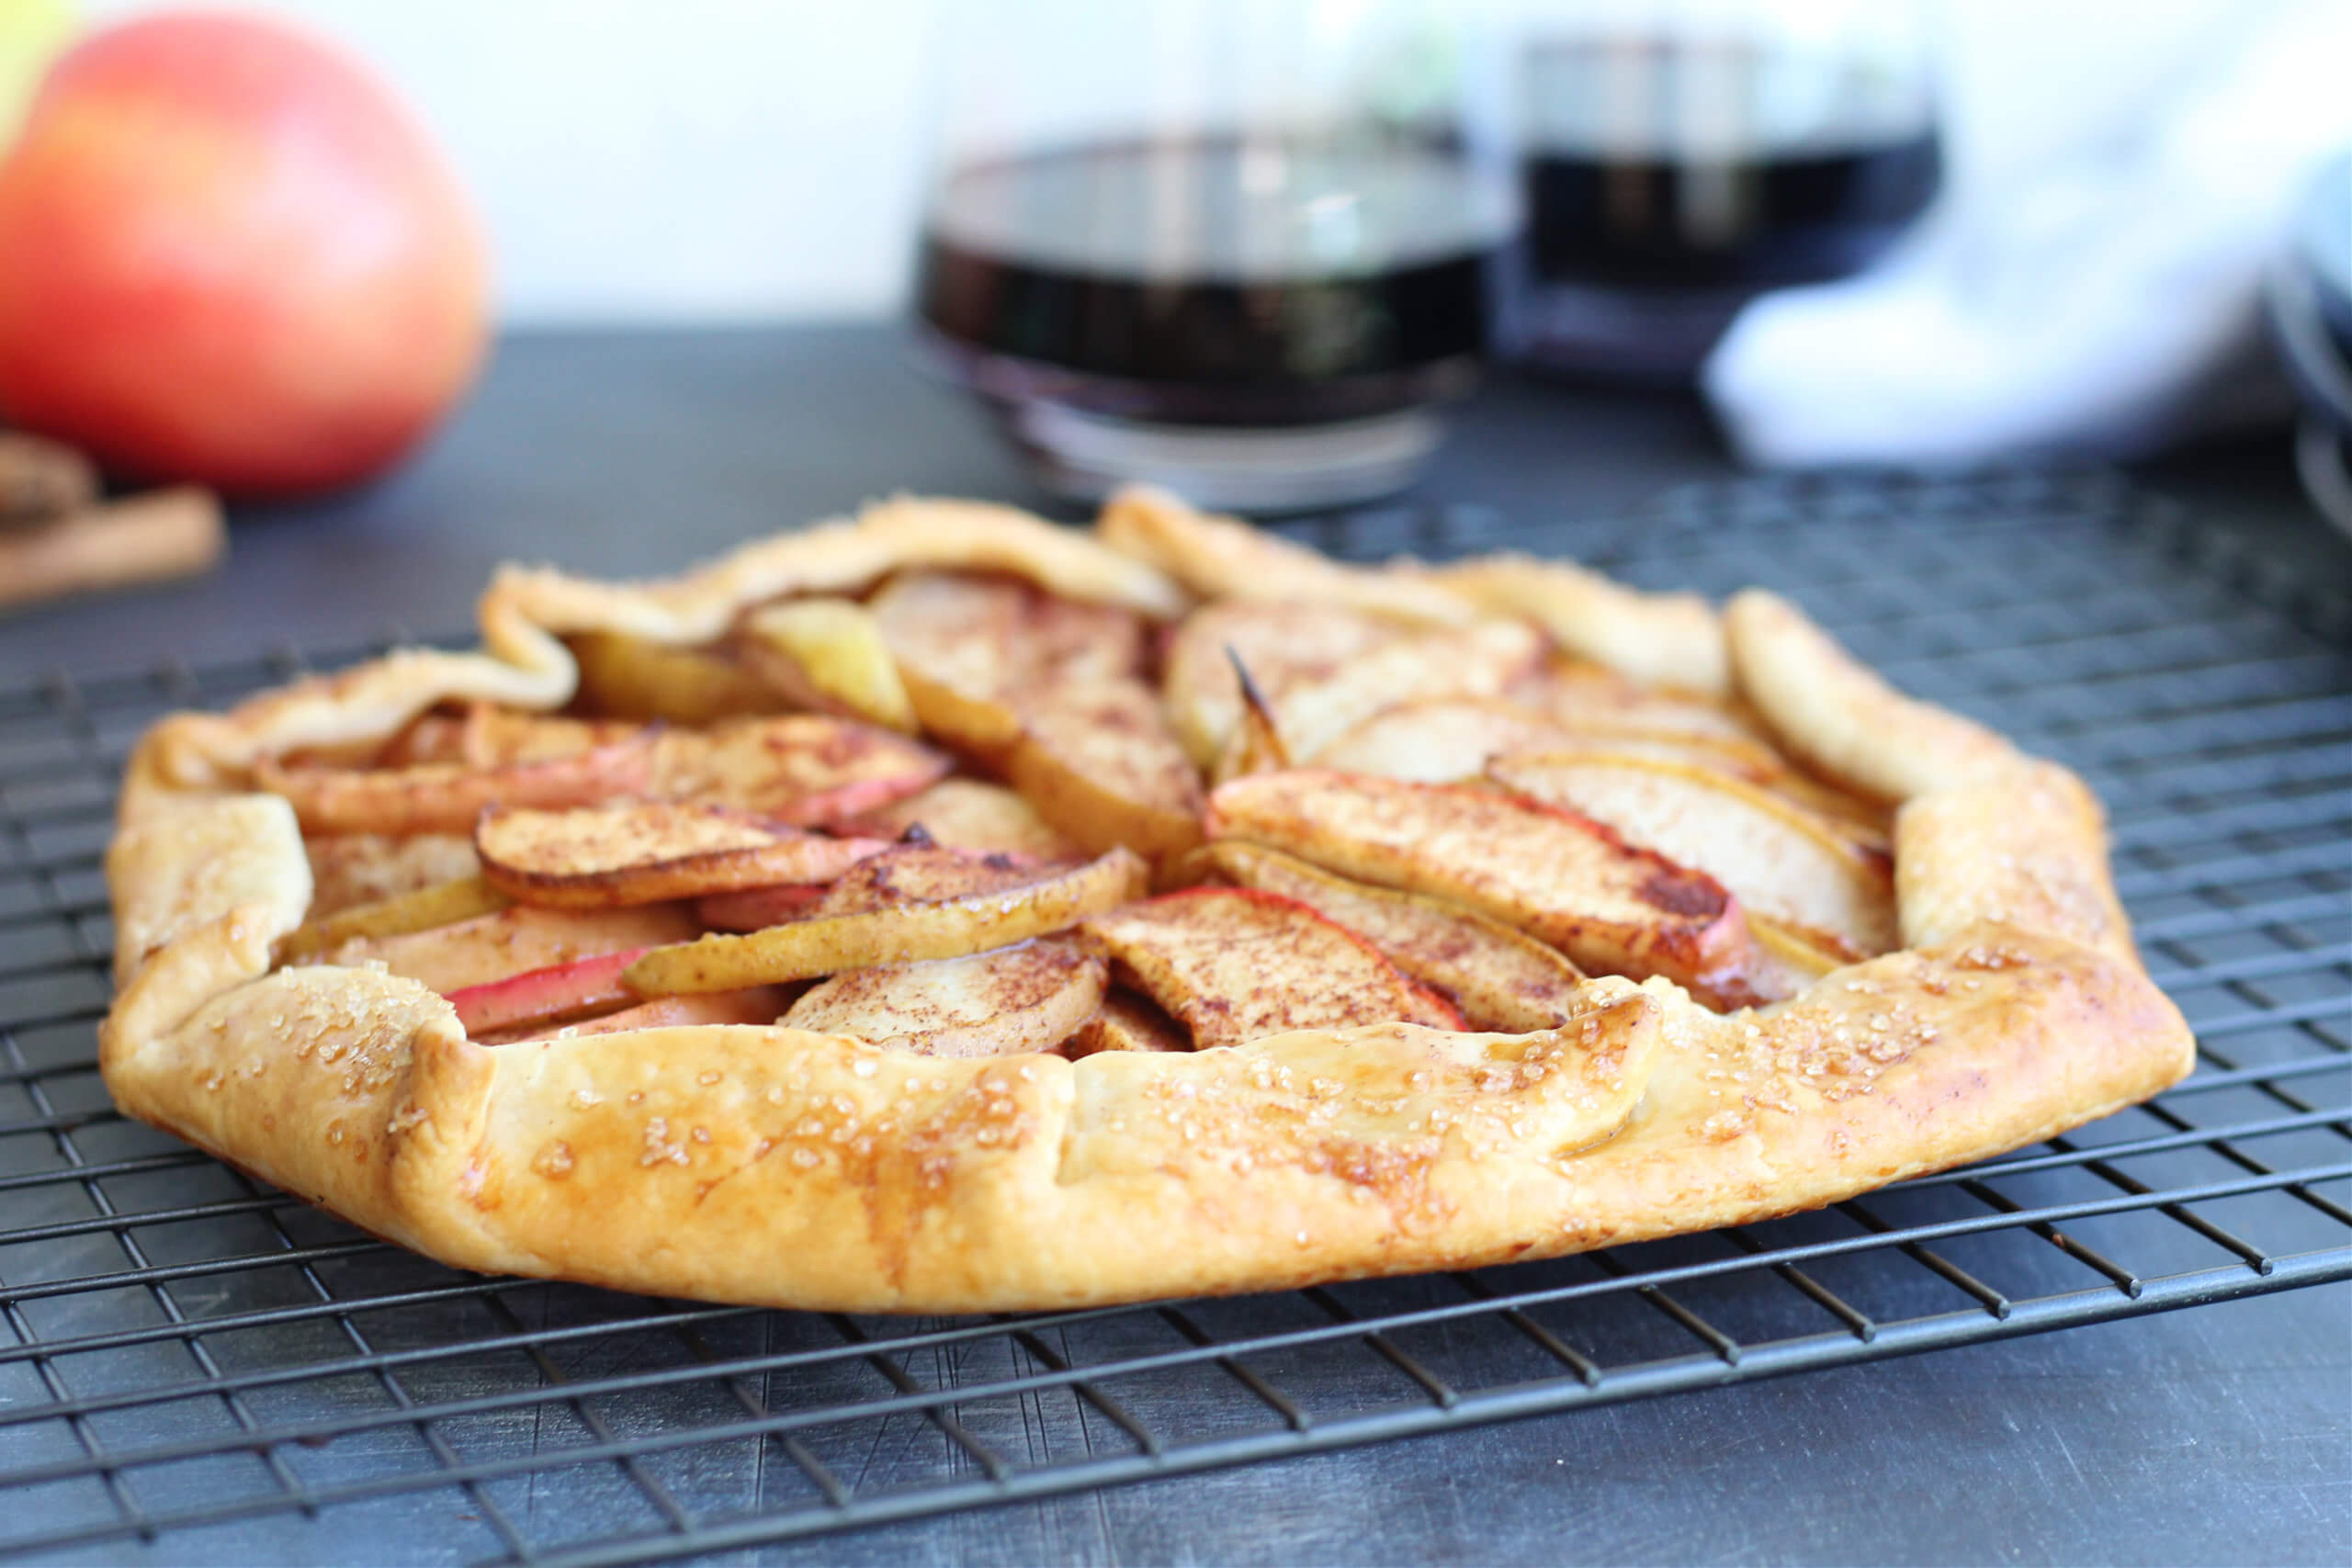
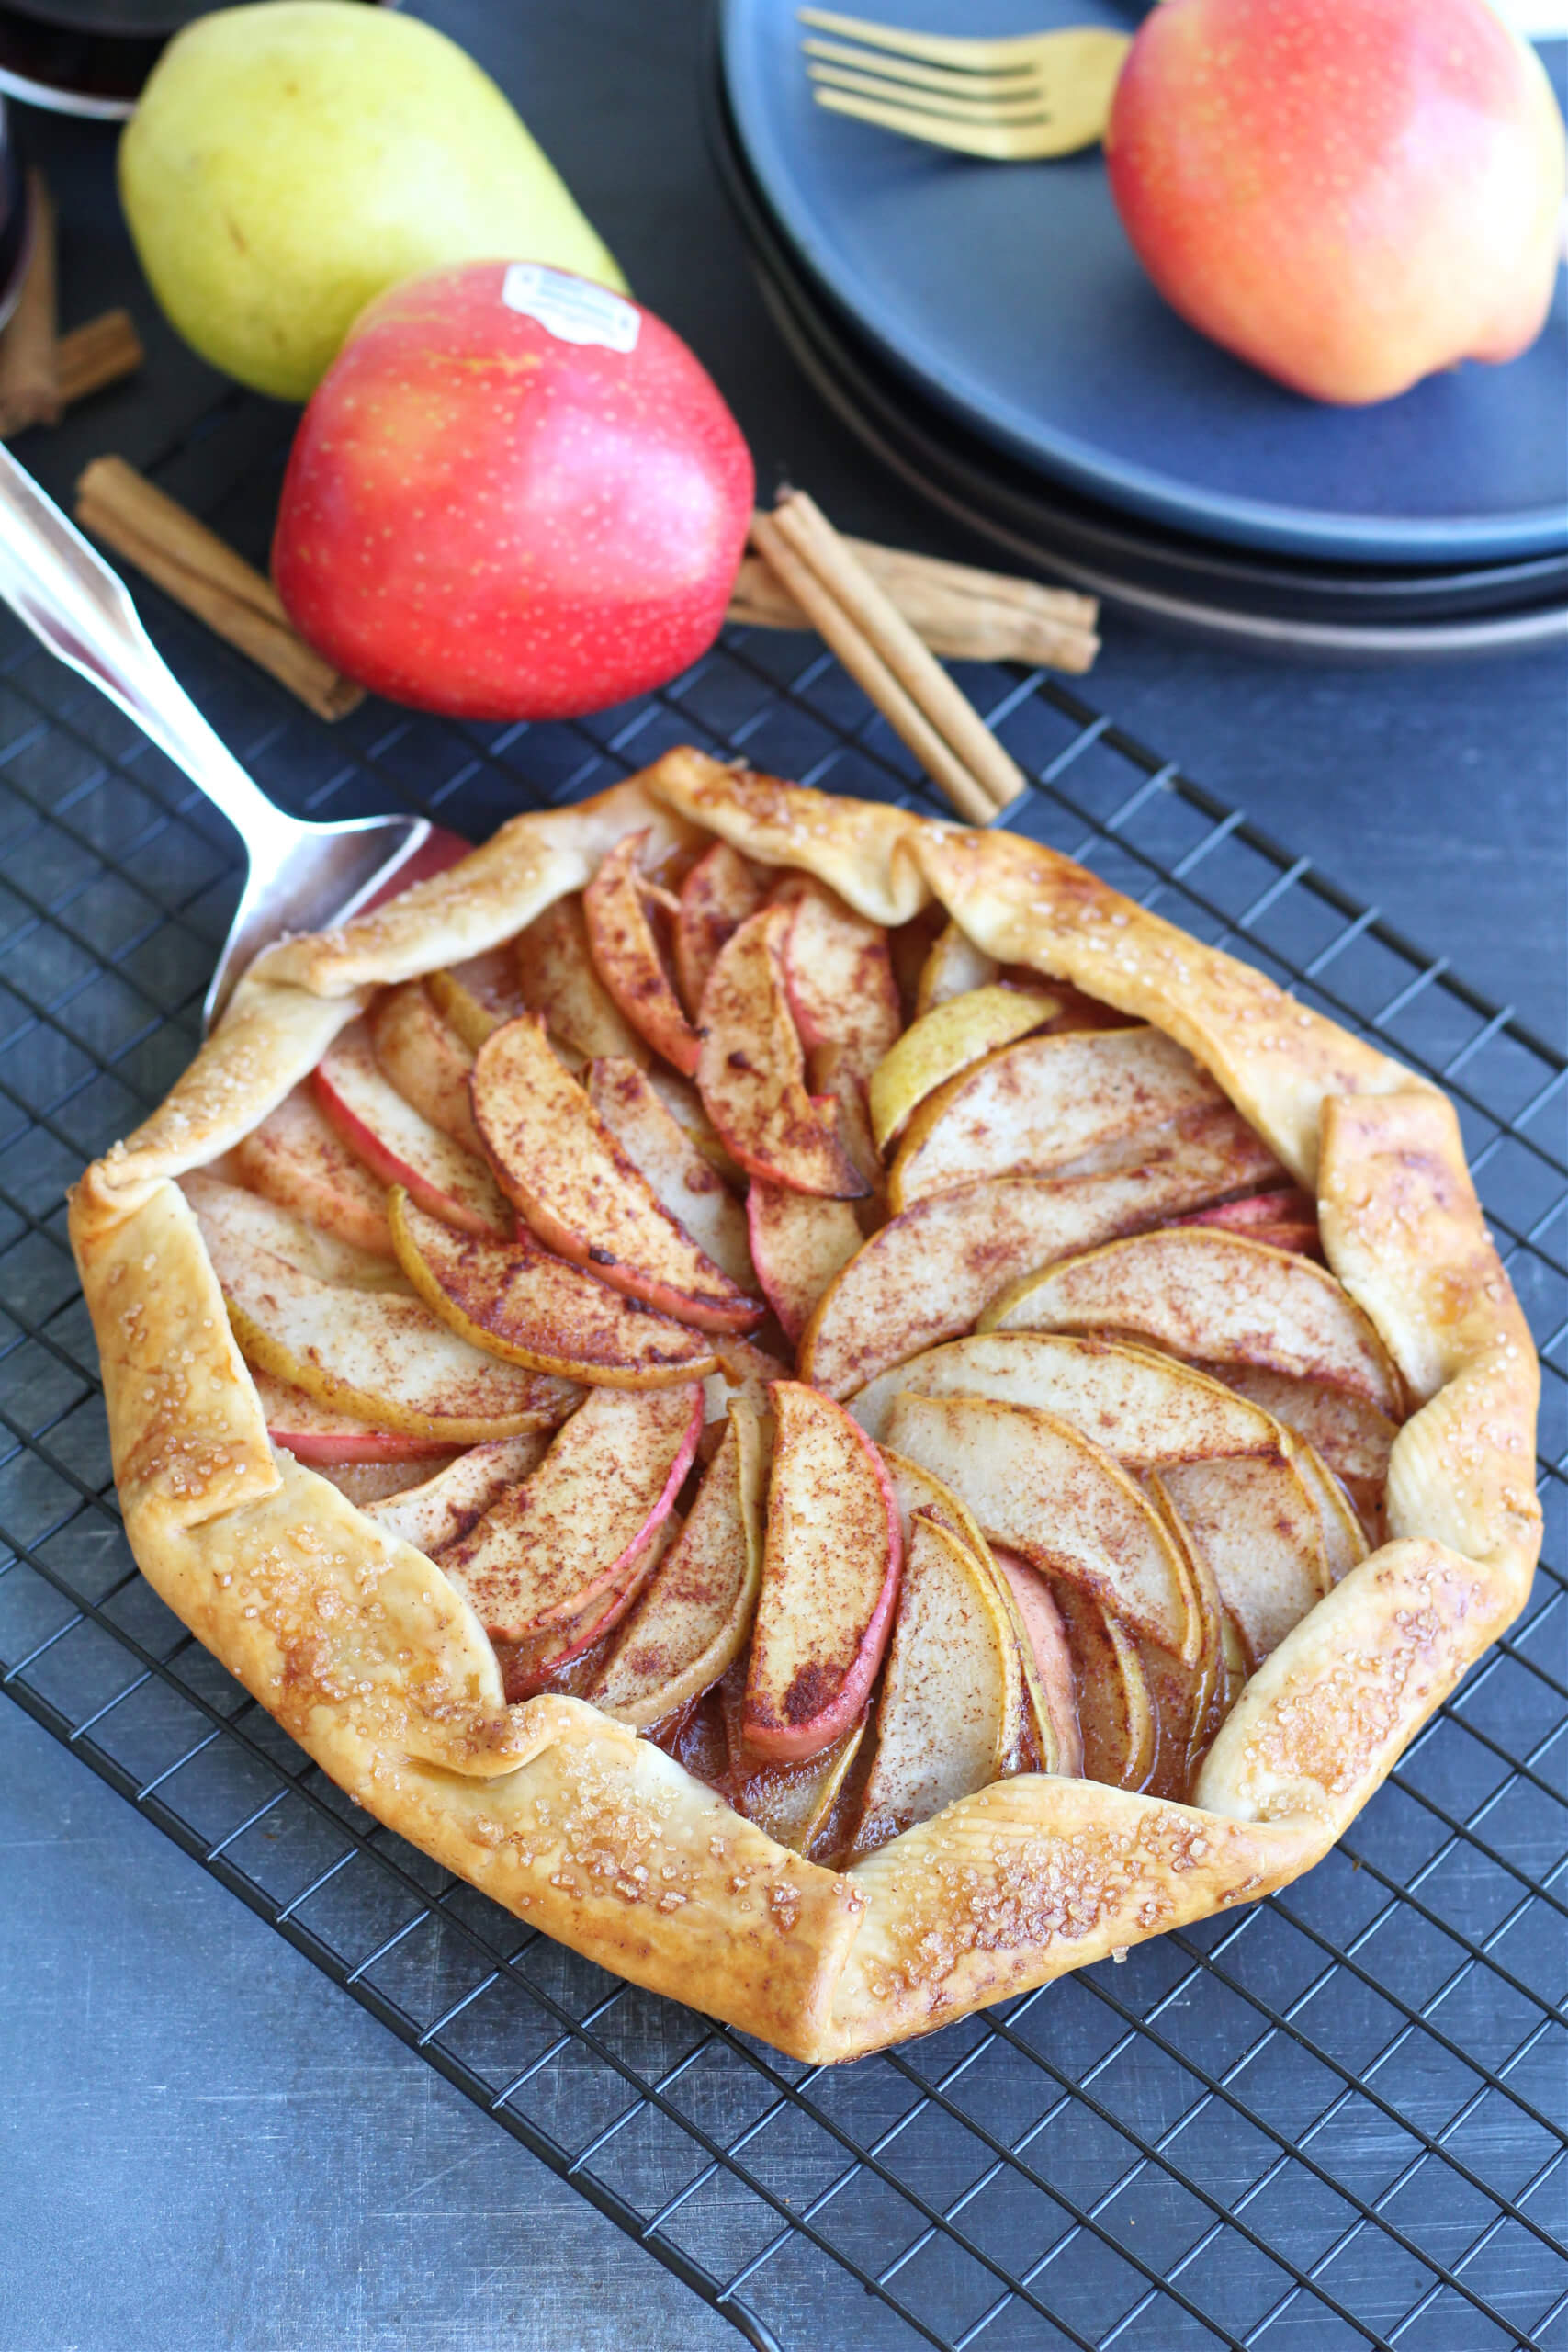
A Galette is a tasty, and easy dessert to make for those busy holiday parties. Unlike traditional pies, this recipe only needs a bottom crust, and since it has an open faced top, it’s a great recipe to turn to when you are pinched for time. Not sure you have a good pie-crust recipe? Use a store-bought crust and no one will know the difference.
With a recipe like this, you can bake with fall fruits for a festive dessert incorporating cranberries, apples, and pears. Just make sure to adjust baking times depending on what fillings you do use.
Need some inspiration? Try this Rustic Apple and Pear Galette recipe:
You’ll Need:
- 1 11-inch pie crust, at room temperature
- 2 tbsp light brown sugar
- 1 tsp ground cinnamon
- 1 apple – core removed and sliced thin
- 1 pear – core removed and sliced thin.
- Juice from 1/2 lemon
- 1 egg white
Instructions
- Preheat oven to 400°F.
- Line a large rimmed baking sheet with parchment paper. *If you don’t have parchment paper, just make sure you spray your baking sheet
- In a medium bowl, combine sliced apples, brown sugar, lemon juice, cinnamon, and a pinch of salt.
- Gently stir to coat apples.
- Arrange apple slices on top of dough, try making a circle pattern. Leave a 1 in – 1.5 in border around the edge.
- Fold the edges towards the center. Repeat until all edges are folded towards the apple slices.
- Whisk egg white in a small bowl; brush over the crust edges.
- Bake for approximately 40 minutes so the edges are golden brown and the apples are soft.
Note: You don’t have to brush egg whites on the crust if you don’t want — it just makes it extra shiny.
Next Level Baker
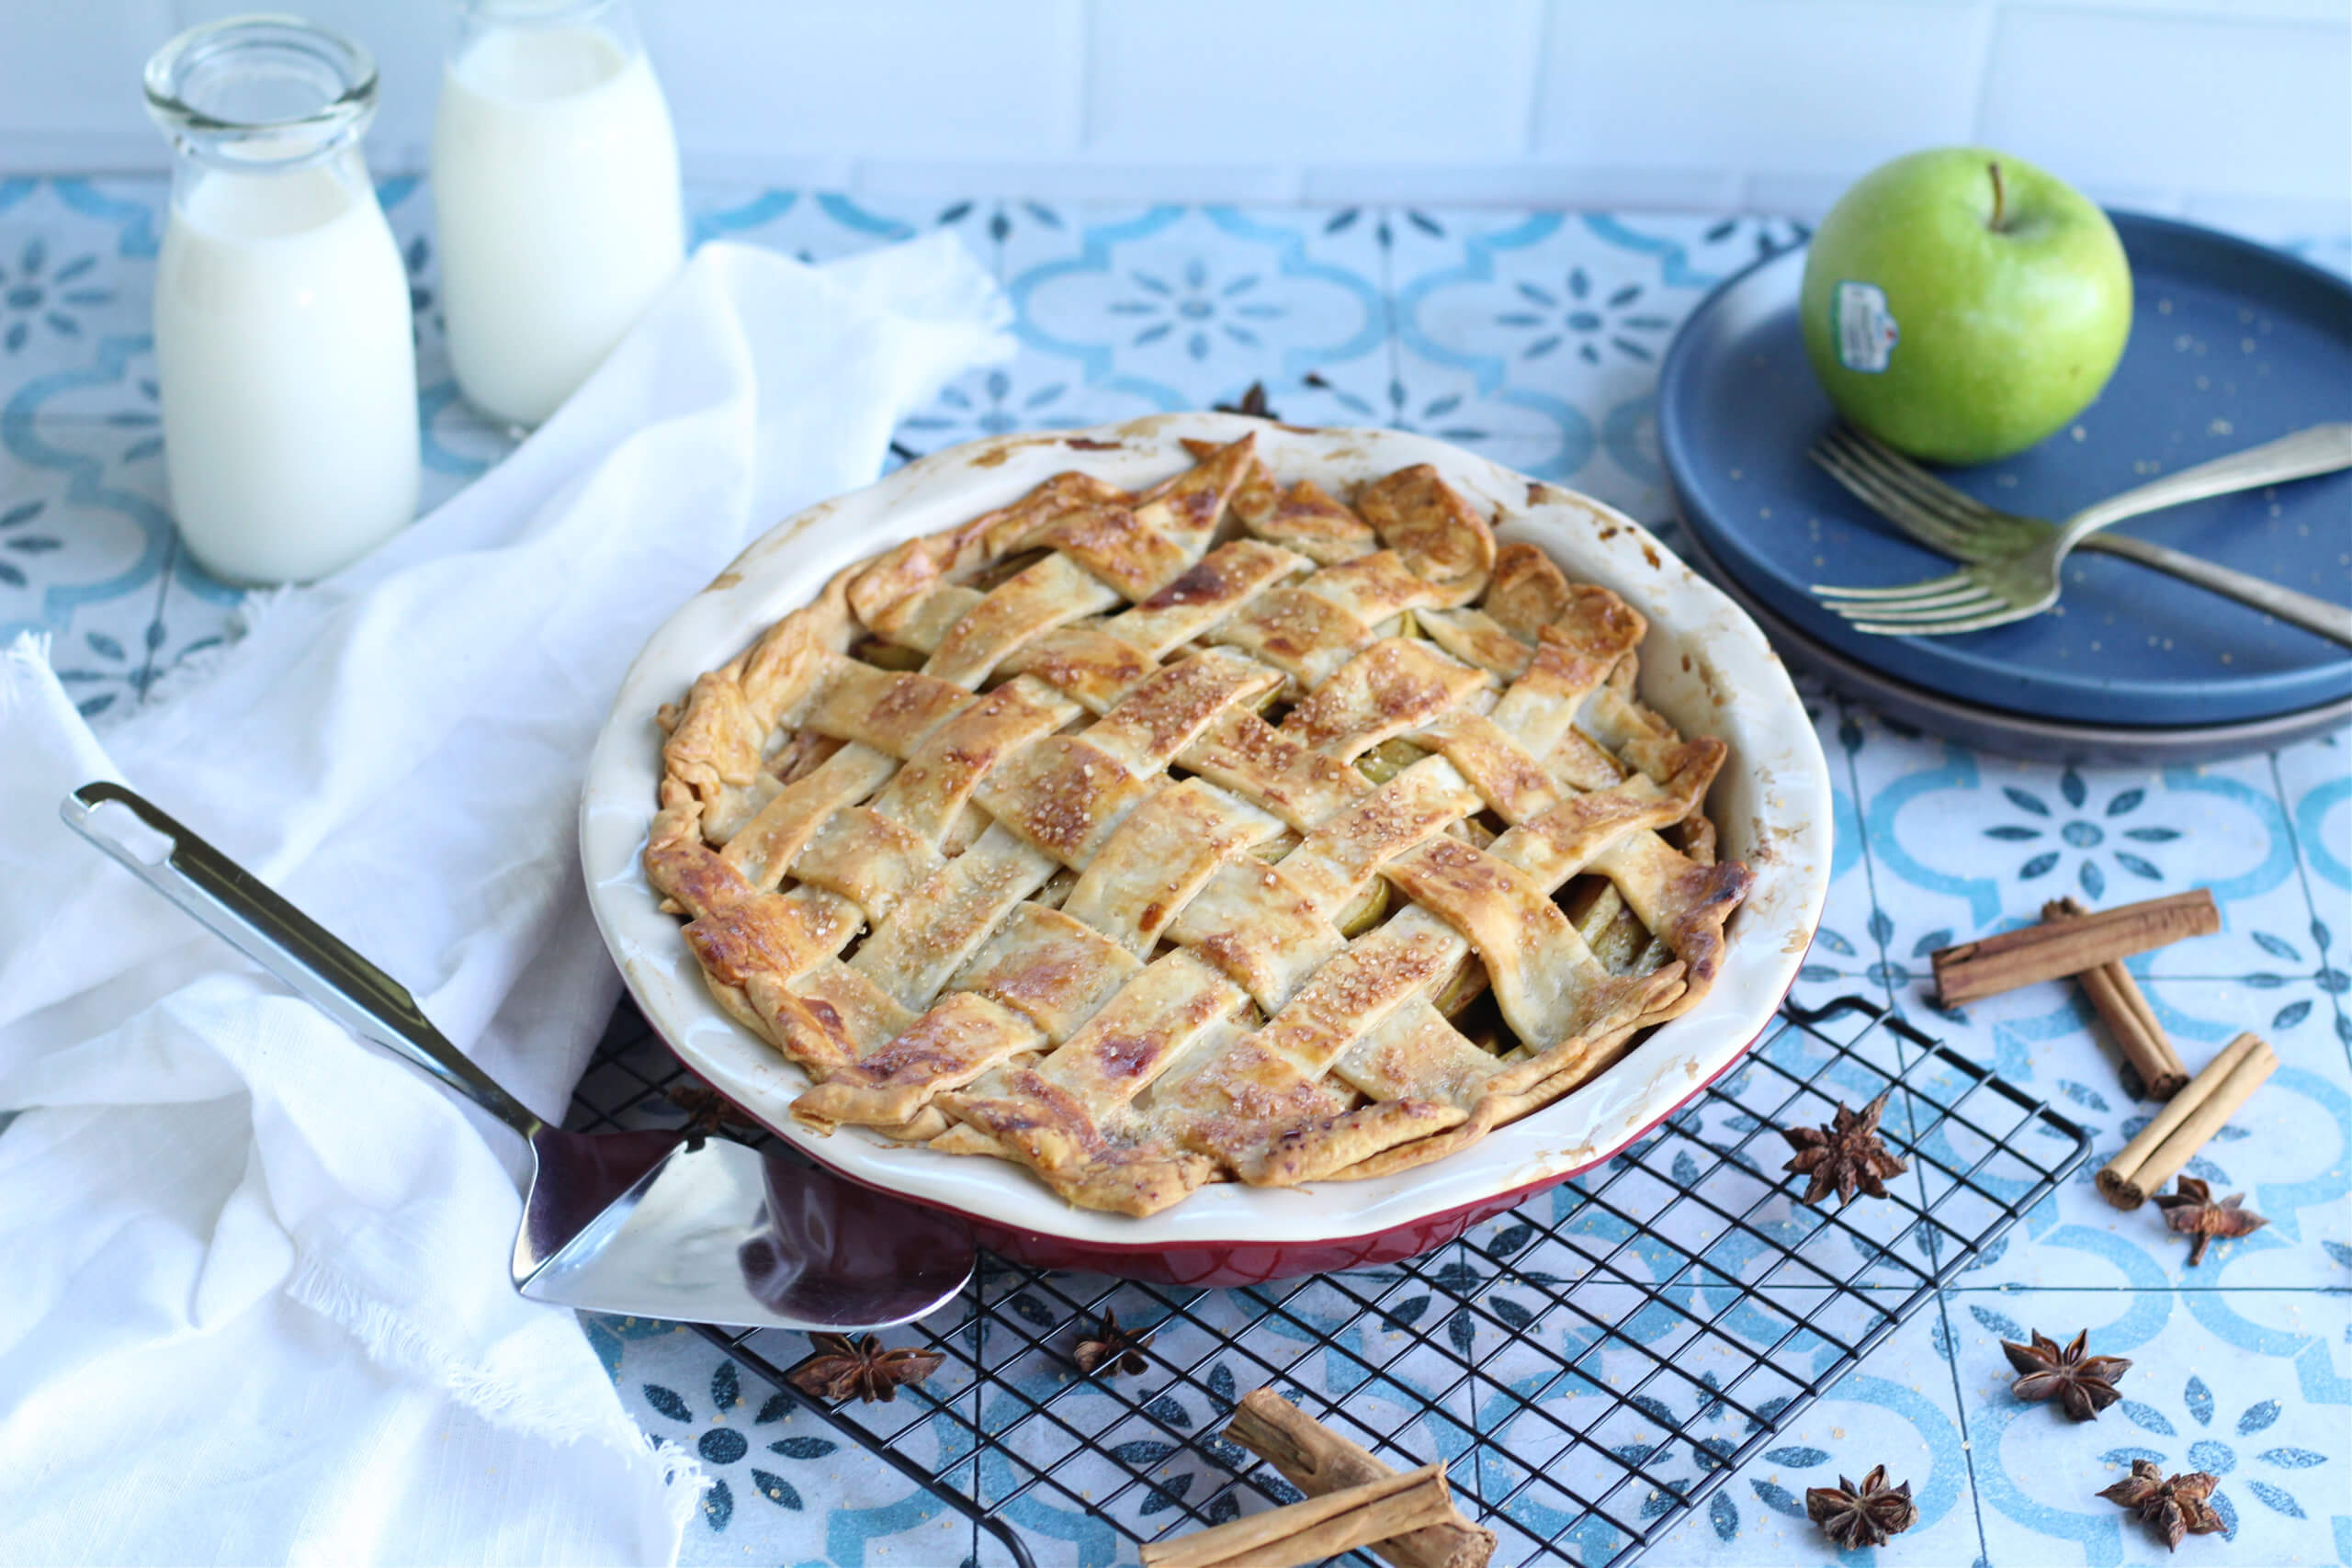
If you’ve mastered your favorite pie recipe, but are looking for the next elevation in pie presentation: Enter the lattice crust! A lattice crust is a simple, cross-weaving pattern that looks fancy, but only adds a few extra steps to topping your pie. Its checker-board pattern gives your guests a glimpse at the delicious filling inside and makes it easy to spot on the dessert table.
Step 1: After putting the bottom crust in your pie pan and adding your filling, roll out the remaining dough. The “top of the pie” is going to get cut into 12 1″ strips.
Step 2: Lay 6 strips vertically and evenly spaced on top of the filled pie. Use the longer strips in the center of the pie and the shorter strips on the ends. Fold every other strip (3 in total) all the way back so they’re almost falling off of the pie. Next, lay one of the 6 unused strips perpendicular on top. Unfold the 3 vertical strips back so they lay over the perpendicular strip. Consequently, you will have 5 strips left.
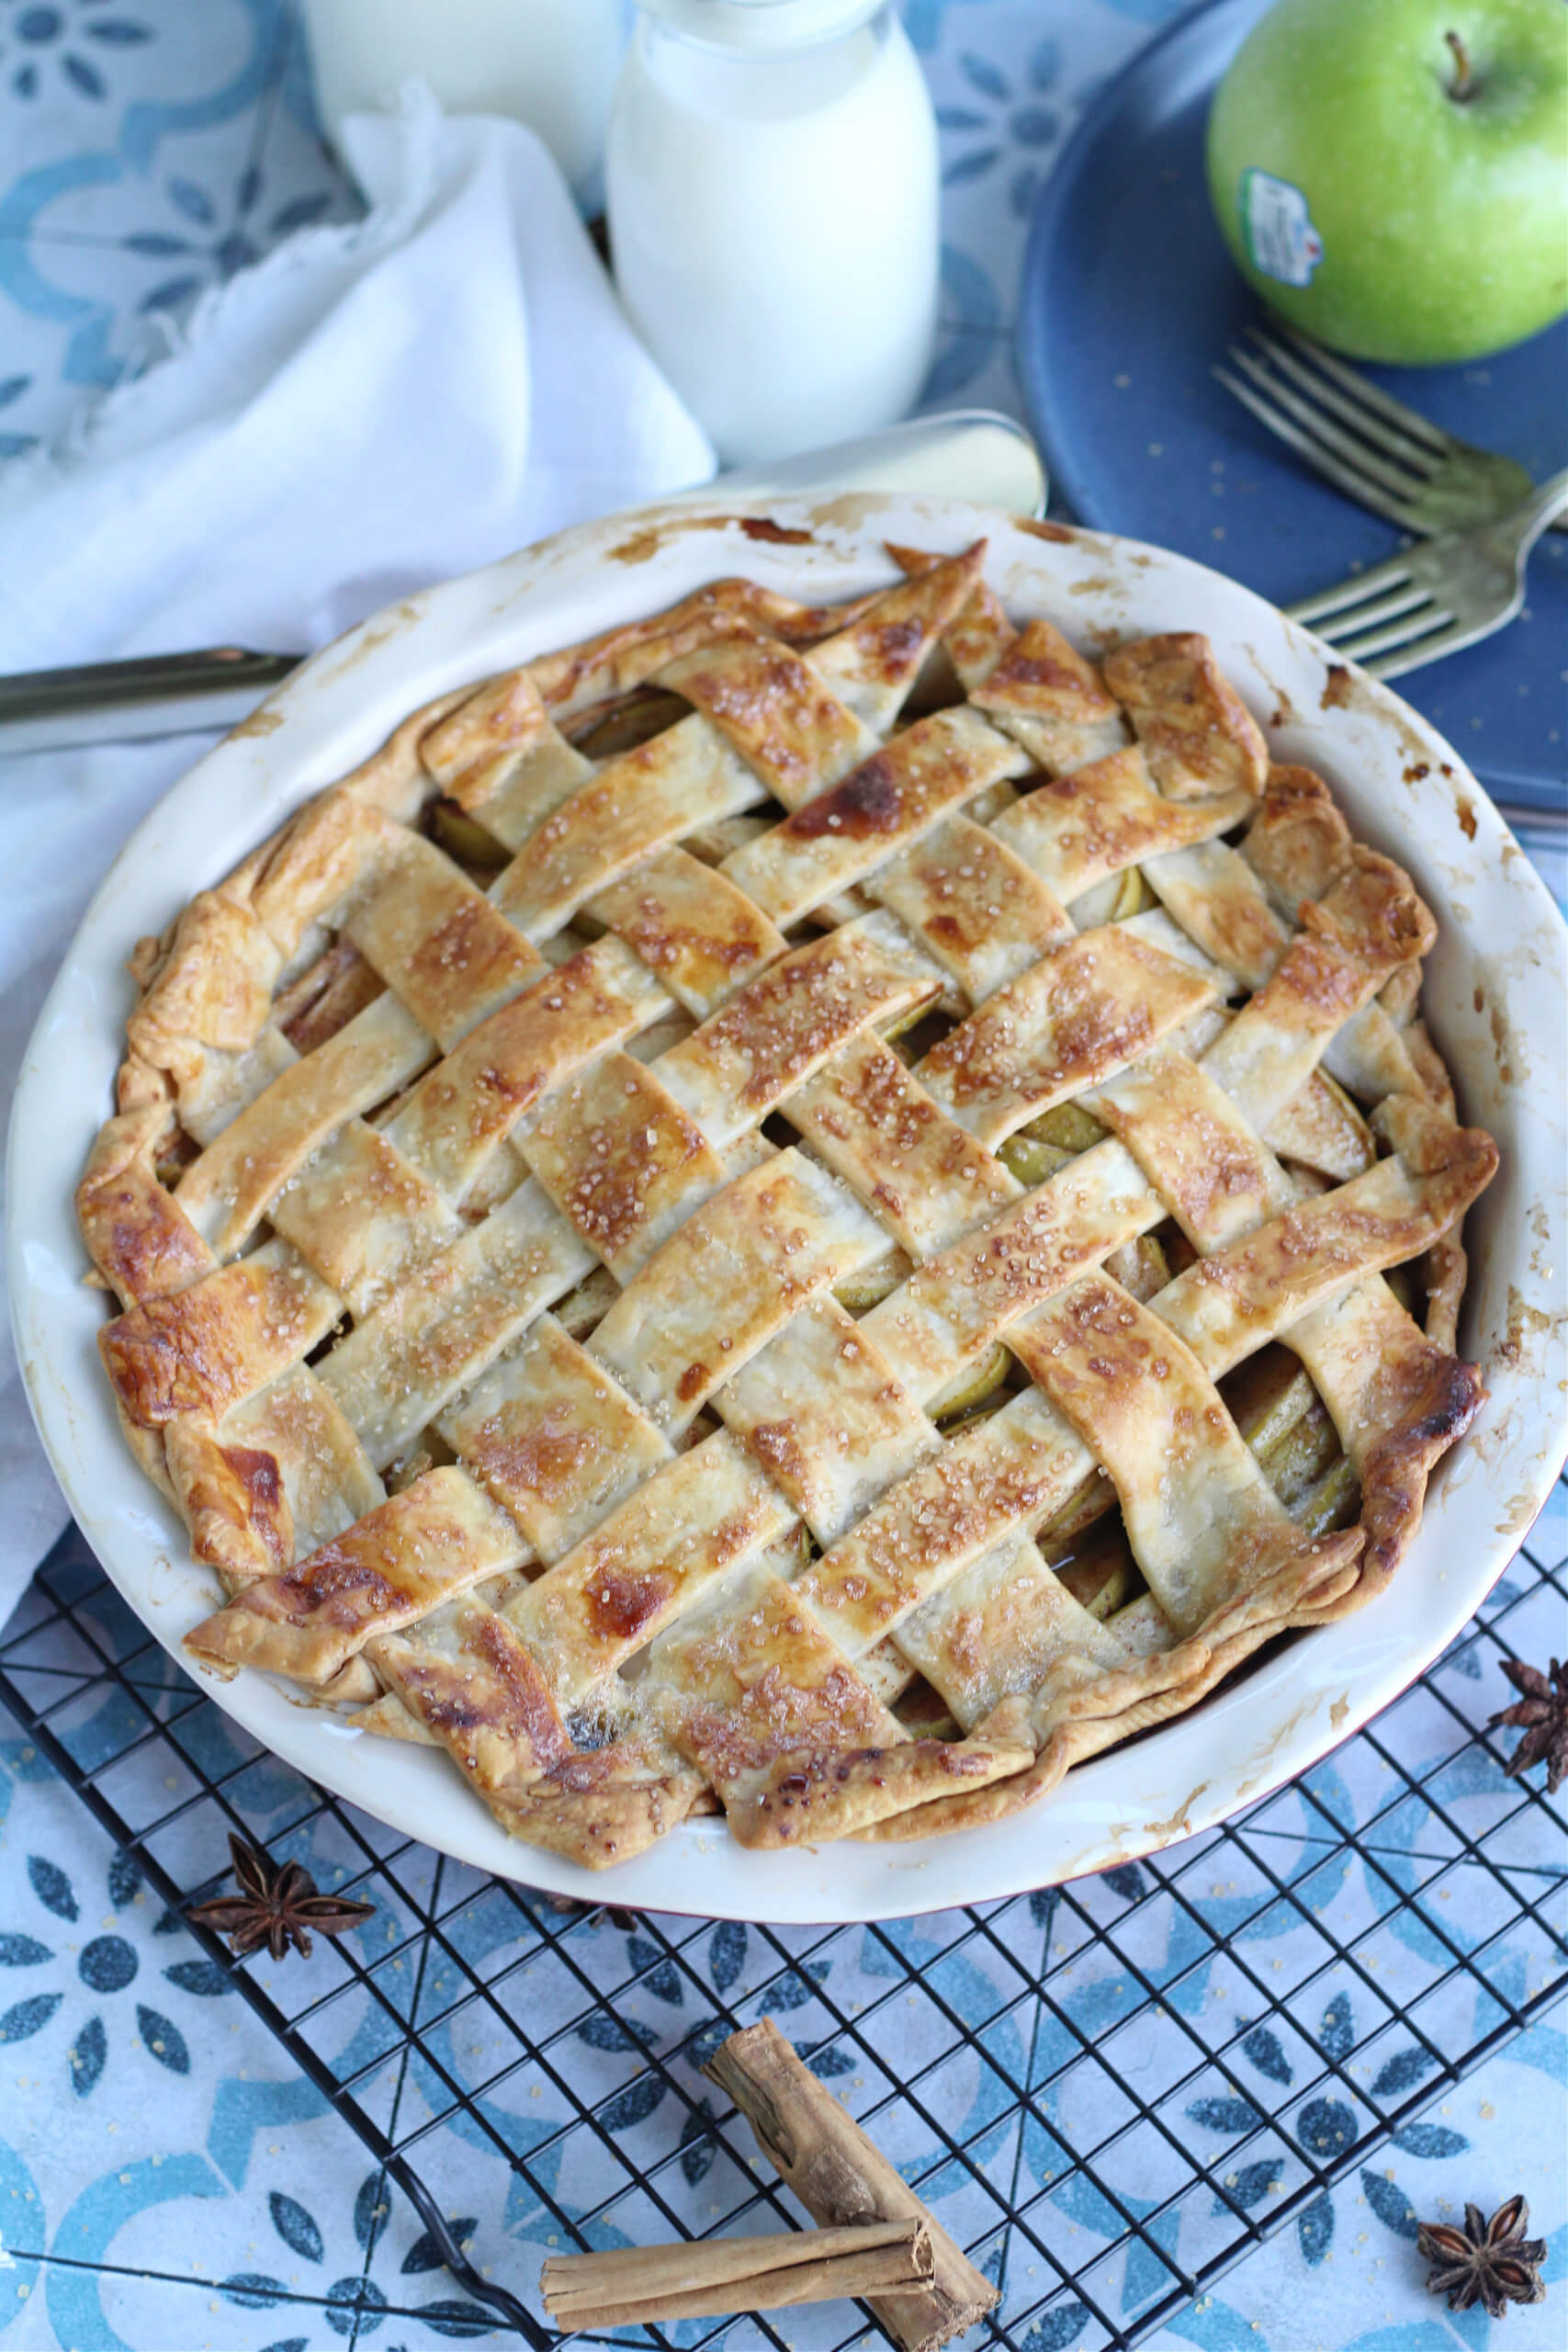
Step 3: Fold the other 3 vertical strips back. Lay one of the 5 unused strips perpendicular on top. Afterwards, unfold the 3 vertical strips back so they lay over the perpendicular strip. Repeat with last 4 strips, weaving the strips over and under one another.
Step 4: Fold the excess dough that lays over the edges of the pie back and pinch them with the bottom pie crust to seal. Brush with egg wash and sprinkle with a little coarse sugar if desired. This will make the top of your crust shiny. Finally, bake the pie as directed in your favorite pie recipe.
The great news is that this pie crust topping goes well with almost any filling. For a great color contrast, we highly recommend adding berries to any apple pie recipe. But if you are looking for a bite of a tart pie, you can add in some cranberries.
If you still need some support on this pie topping, watch the video below for a visual representation.
Let’s Get Fancy!
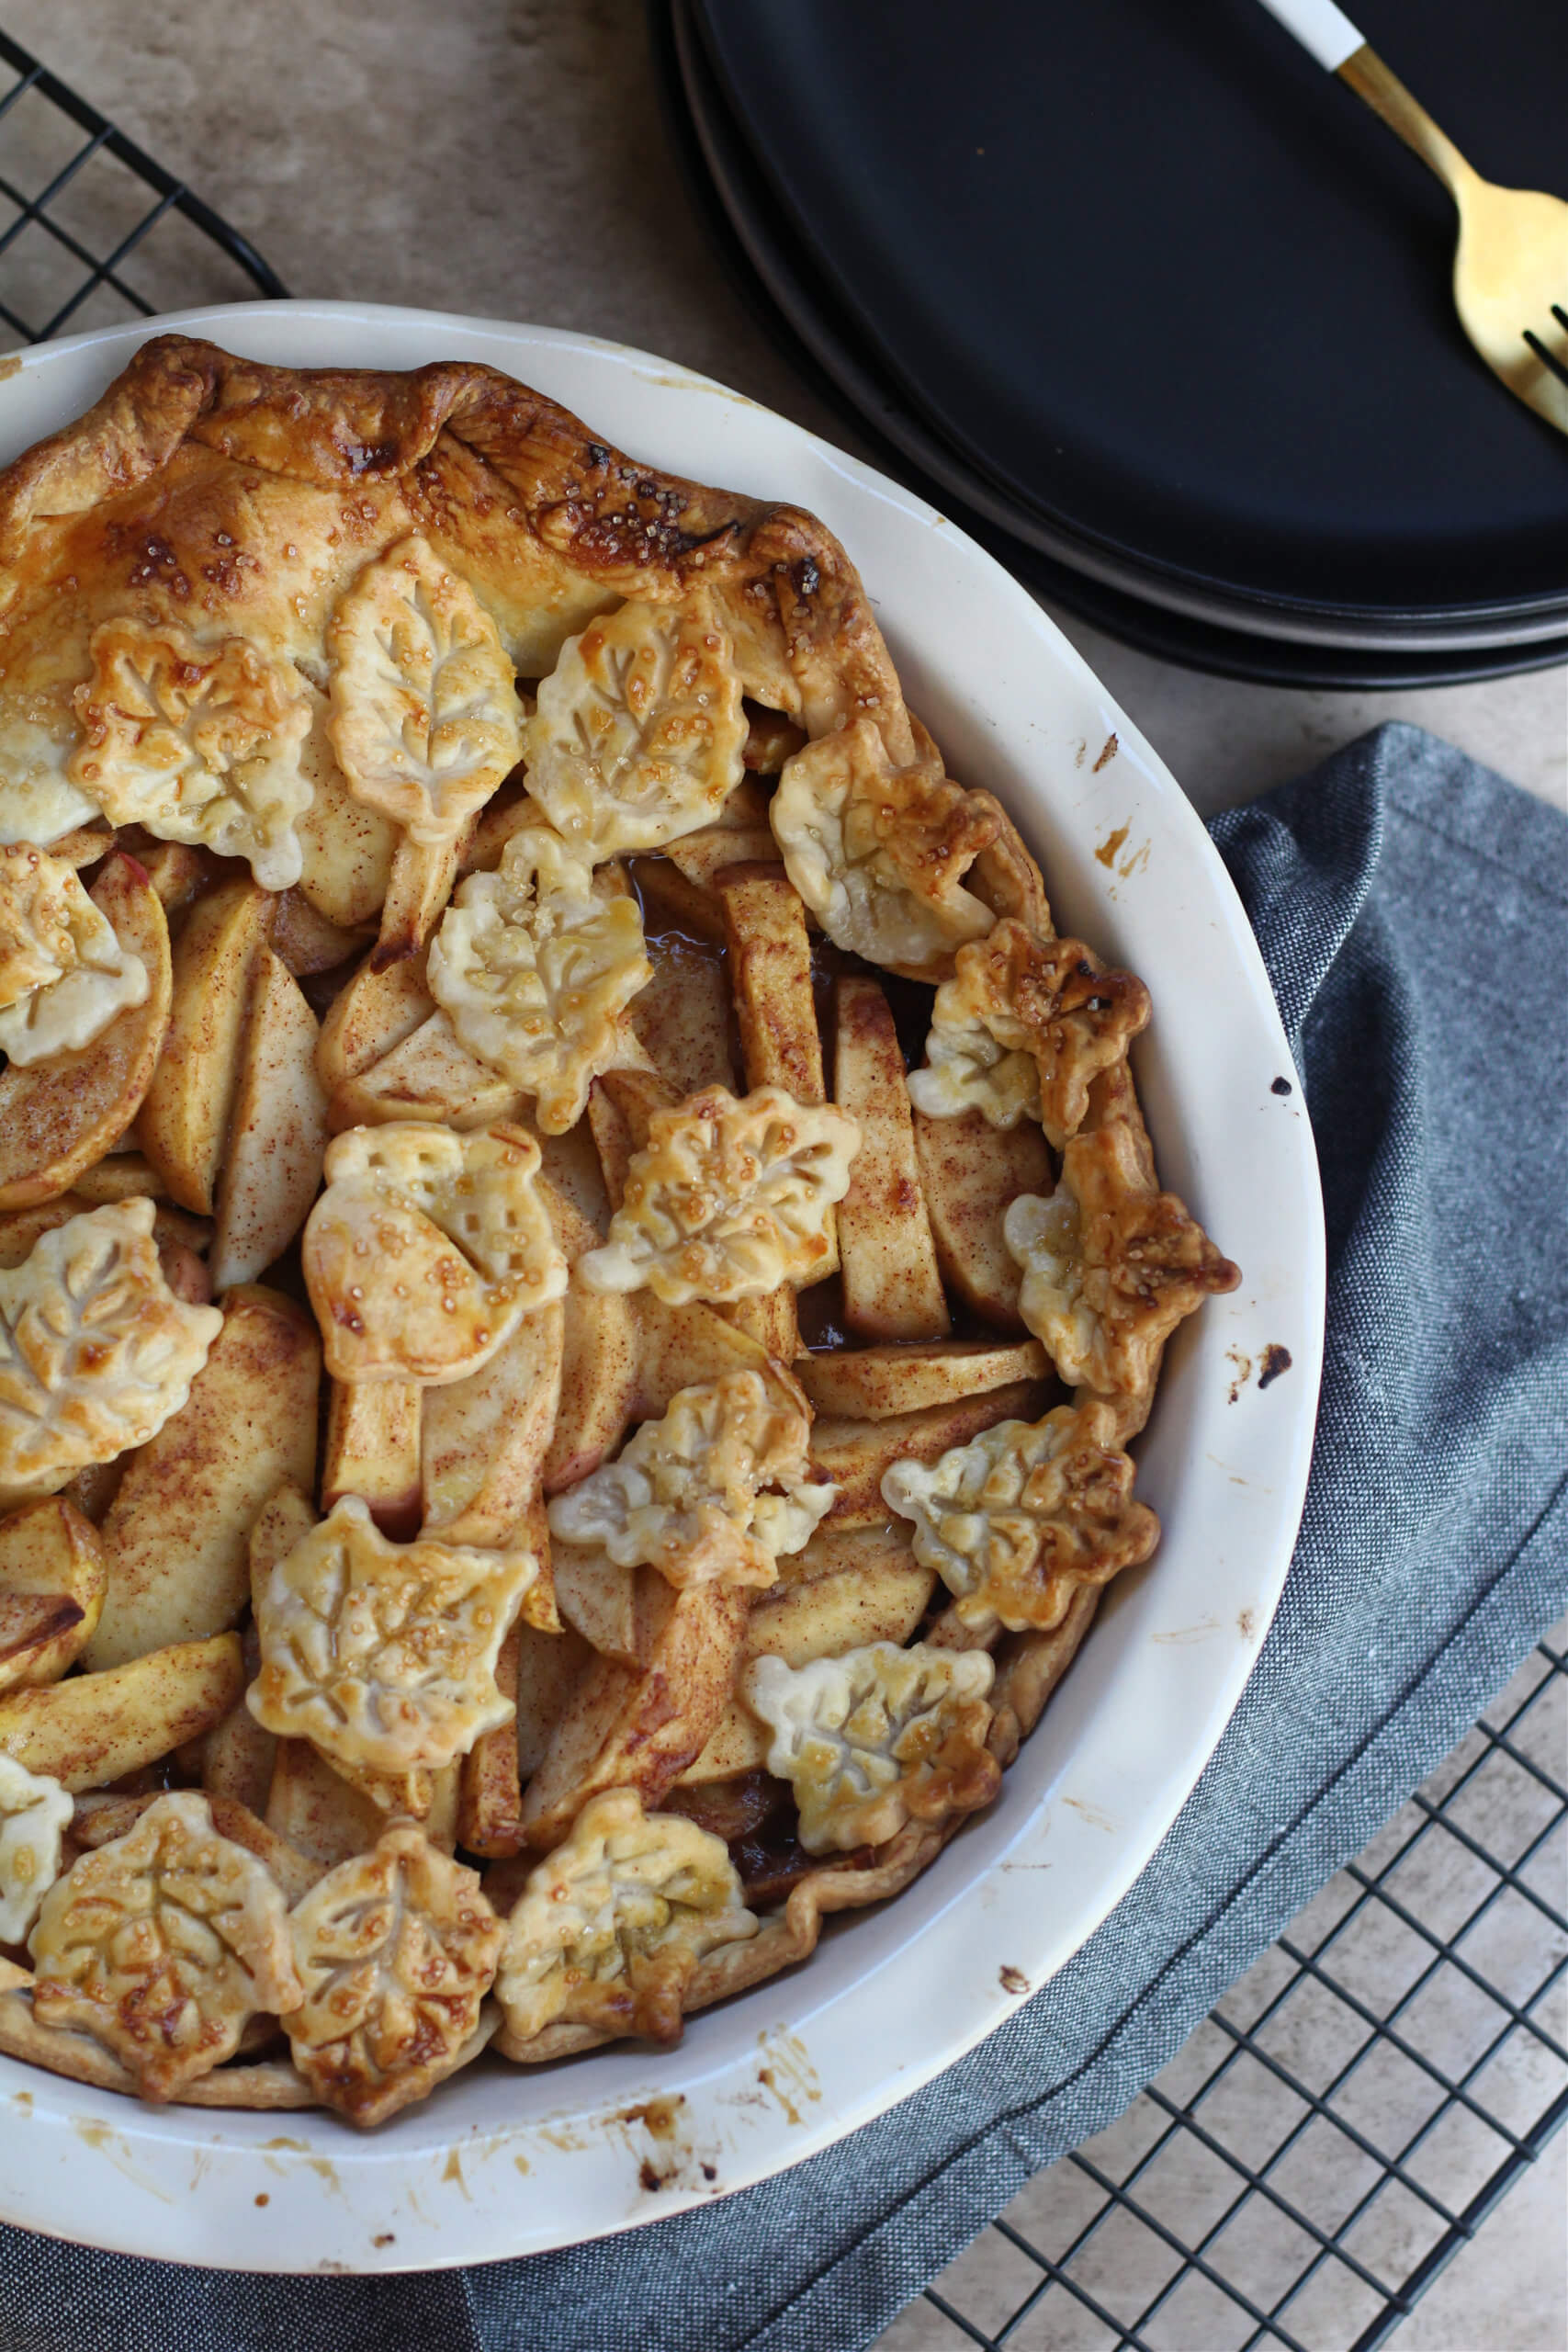
You’ve been building up your baking game for years, but now it is time to get extra fancy with your pie crusts! We recommend a Leaf Pie Crust! This pie crust is designed for those that want to spend a little extra time in the kitchen with their desserts. It requires fall pastry stampers, which are available either at a local kitchen/bake store or online. But if you aren’t feeling the fall leaves, you can always go for whichever designs that you like.
This method is quite similar to a basic pie crust or even lattice pie crust. You’ll want to make sure that the base of your pie (bottom crust/filling) is complete and you will then roll our the remaining pie dough. And make sure to use flour so it doesn’t stick to your countertops.
Once you have the pie dough rolled out, you will want to make a crescent cut on one side of the crust. This will be be used for one side of the pie (or feel free to simply do all leaves). Next, using the pastry stampers, cut out the remaining dough with your favorite designs. Follow the instructions of your stamps for best use.
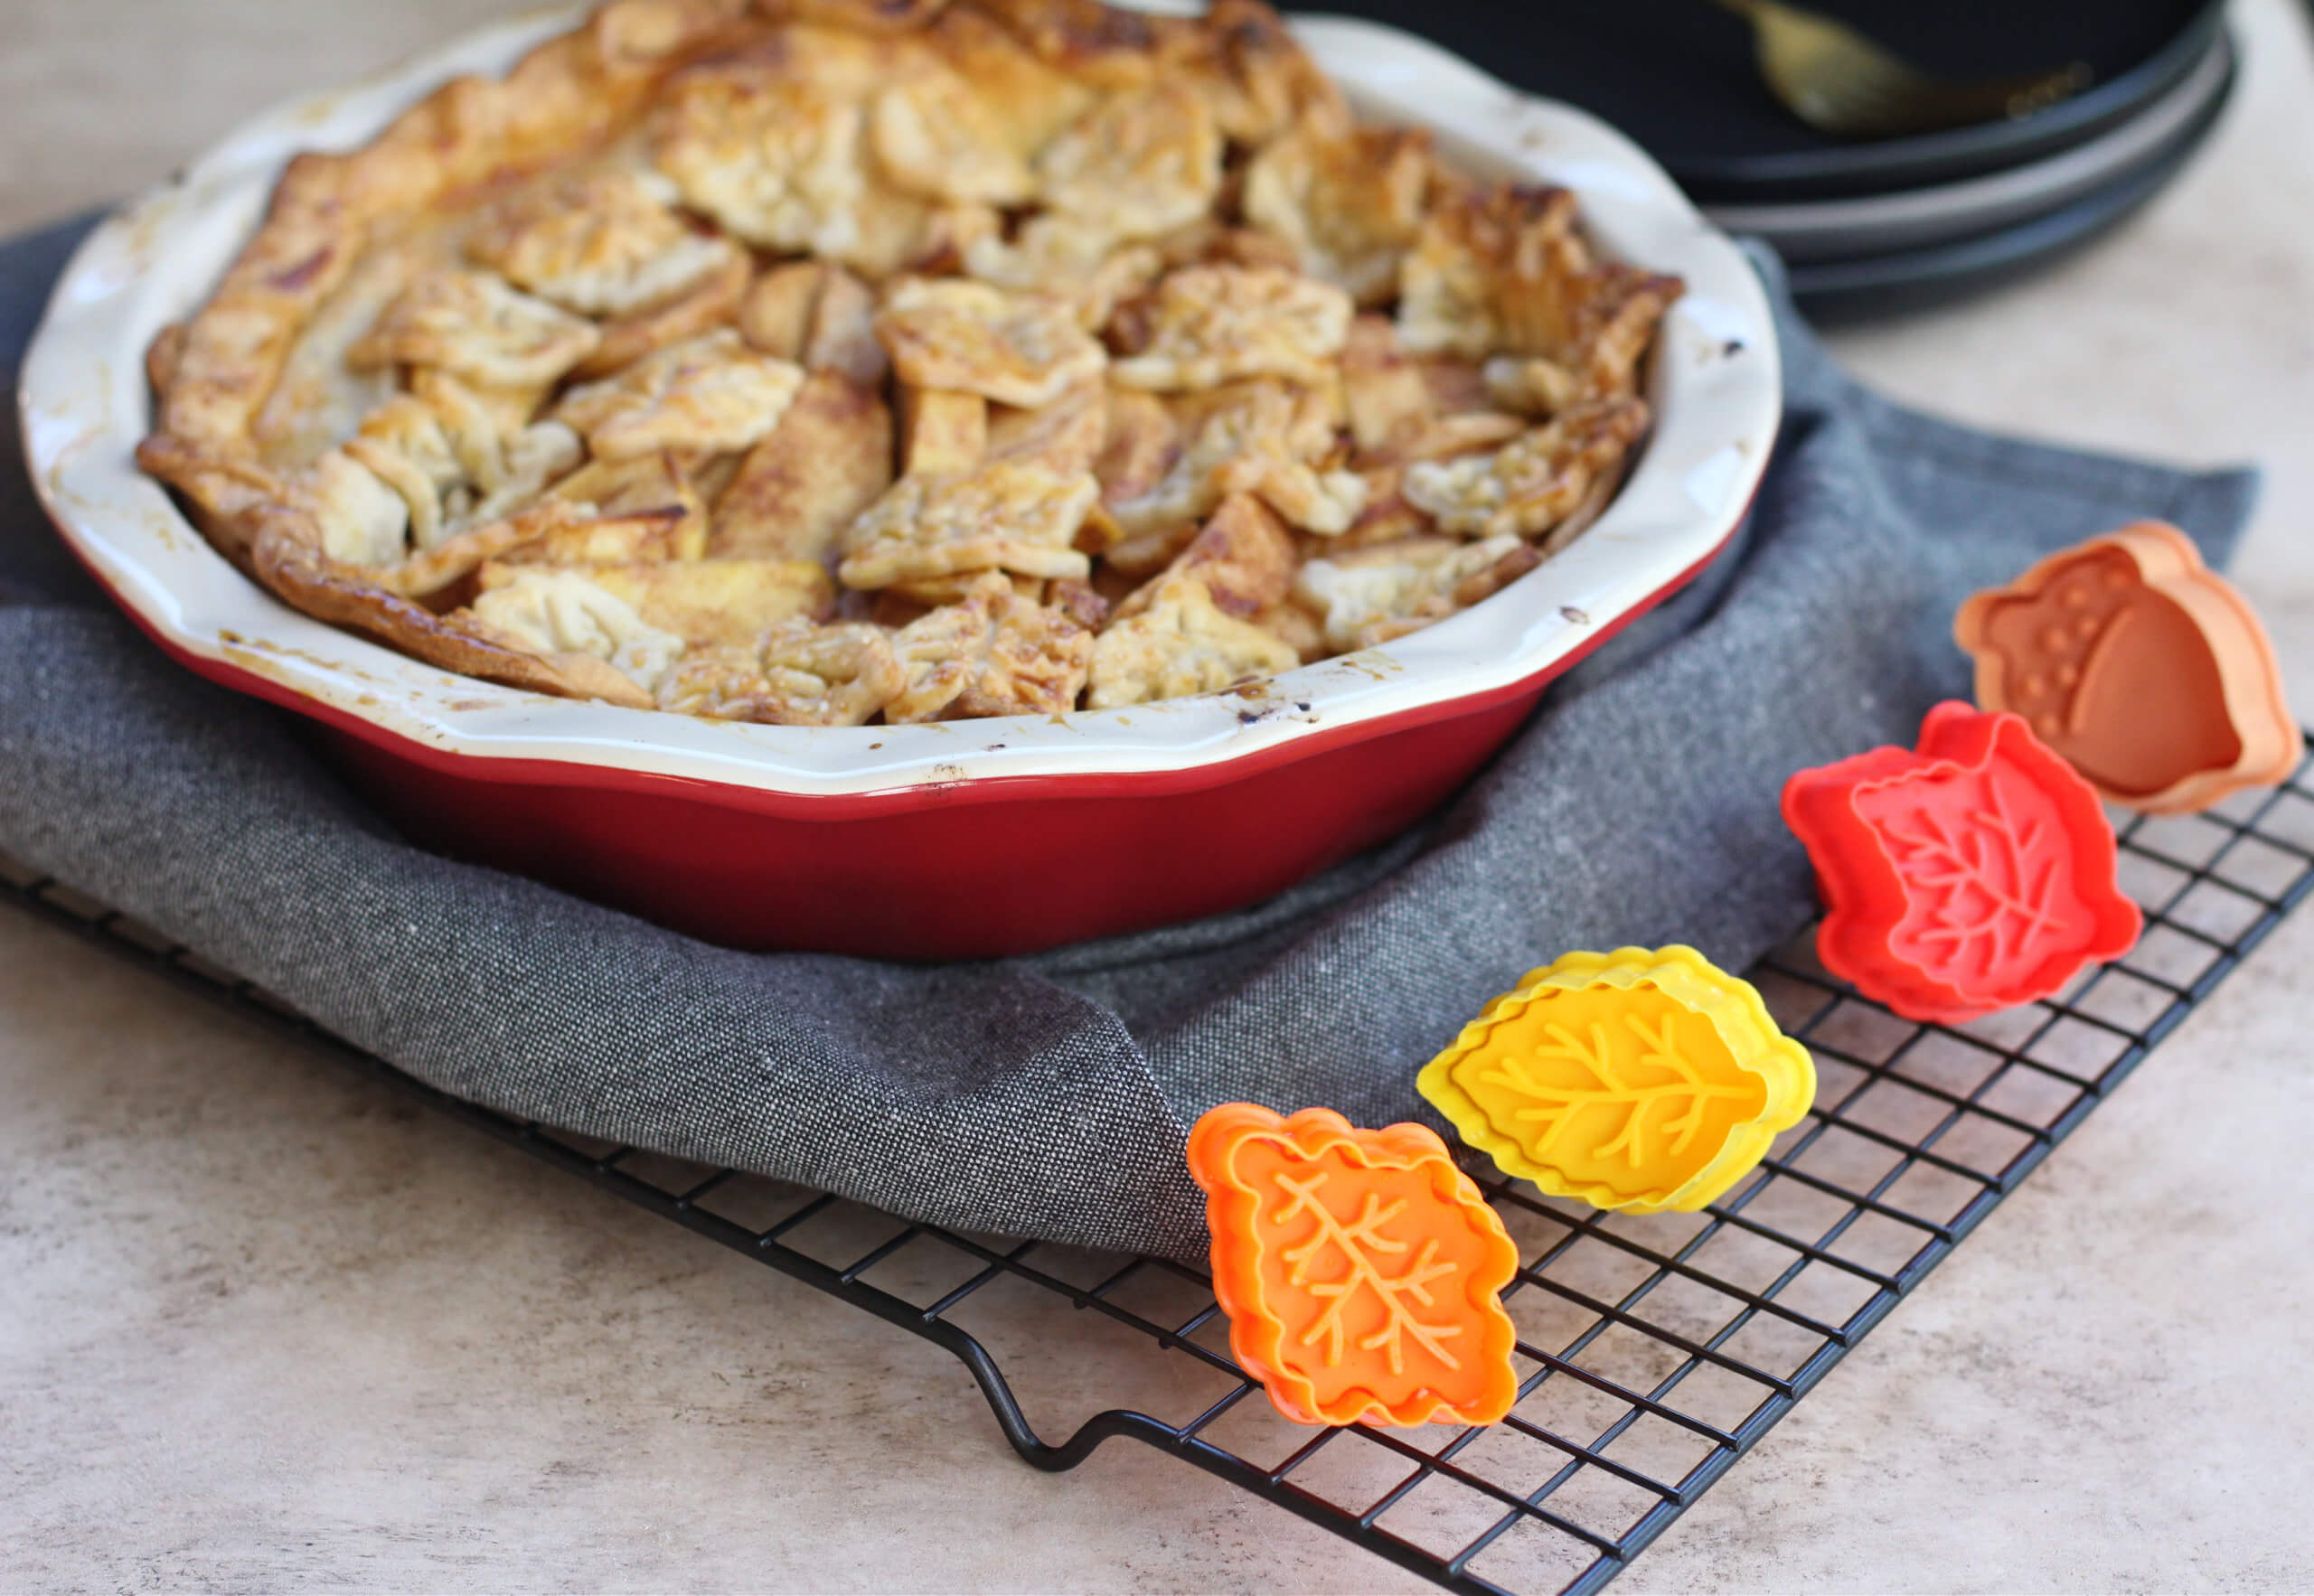
Brush all your leaves with an egg wash and sprinkle with a little coarse sugar (if desired). The egg wash will help make the pie crust shiny, but you can always skip this step. Then, you will place the crescent cut out on one side of the pie and pinch the dough with the bottom, before you start placing your leaves around the rest of the pie.
When everything is in place, bake the pie as directed. Your finished pie will be an elegant design piece, best placed in the middle of the dessert table for all to see.